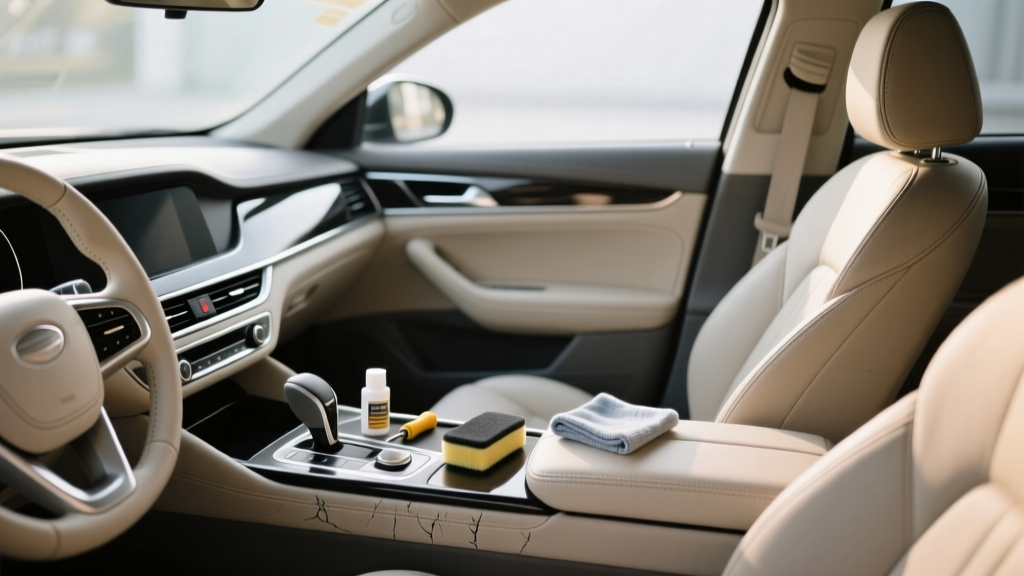
Scratch Repair Methods for Your Vehicle (2026)
Scratches happen?sometimes from a careless zipper on a seat bolster, sometimes from hauling gear in the trunk, and sometimes from daily wear on high-touch surfaces like door panels and center consoles. The problem isn?t just how scratches look; it?s how quickly they can turn into bigger issues. A scuffed steering wheel can feel rough and wear faster, a scratched door card can lower resale value, and a gouged trim piece can trap dirt and become harder to clean over time.
Part 1 focused on diagnosing scratch types and choosing the right approach. This Part 2 takes you deeper into the methods that work best for interior materials?vinyl, plastic, leather, and high-gloss trim?with step-by-step instructions, product comparisons, and real-world scenarios. The goal is simple: help you pick a repair method that matches the damage, the material, and your expectations, so you don?t waste money (or make a scratch worse).
If you want your cabin to look cared-for without paying dealership-level repair bills, the right scratch repair technique can make a dramatic difference?especially when you combine careful prep with realistic expectations about what can be ?invisible? versus ?greatly improved.?
Start with the Surface: Material and Scratch Type Decide Everything
Before you reach for a product, confirm two things:
- Material: leather, vinyl (synthetic leather), textured plastic, painted plastic, or glossy ?piano black? trim.
- Scratch depth: light scuff (surface transfer), shallow scratch (into the top layer), or deep gouge/tear (material displaced).
A quick way to assess depth is the fingernail test:
- If your nail doesn?t catch: usually a scuff or very light scratch?cleaning and mild polishing may fix it.
- If your nail catches slightly: shallow scratch?may need heat (plastics), filler (vinyl/leather), or targeted polishing (gloss trim).
- If your nail catches hard or the material is torn: deep damage?filler/patching or part replacement is often the best outcome.
Method 1: Cleaning and Transfer Removal (The ?Scratch? That Isn?t One)
Many ?scratches? are actually paint, rubber, denim dye, or shoe scuff transfer sitting on top of the surface. This is common on door sills, lower door panels, seat side bolsters, and center console plastics.
Best for
- Black scuff marks on light plastics
- Rubber transfer on door sills
- Unknown marks on vinyl and textured plastics
Step-by-step
- Vacuum and dust first to avoid grinding grit into the surface.
- Clean with a gentle interior cleaner and microfiber towel.
- If the mark remains, use a dedicated interior APC (all-purpose cleaner) diluted appropriately for interiors.
- For stubborn transfer, try a lightly dampened melamine foam (magic eraser)?very gently, with minimal pressure.
- Wipe with a clean damp microfiber to remove residue, then dry.
Product picks (interior-safe options)
- General cleaning: Meguiar?s Quik Interior Detailer, Chemical Guys InnerClean (light-duty cleaning and finish)
- More bite (use carefully): a quality APC like CarPro MultiX (diluted) or Meguiar?s APC (diluted)
- Transfer removal: melamine foam (use sparingly?can dull textured plastics if overused)
Real-world example: A gray ?scratch? on a door panel after passengers exit the car is often rubber sole transfer. In many cases, it disappears with APC and a microfiber?no repair kit needed.
Method 2: Heat Reflow for Textured Plastics (Use With Caution)
On certain textured plastics, light scratches can sometimes be softened by gently warming the area. Heat can relax the plastic surface, reducing the visibility of fine abrasions. This is a technique detailers use on bumpers and some interior trims?but it?s easy to overdo.
Best for
- Light scratches on matte/textured plastic (door panels, kick panels)
- Scuffs that look ?whitened? from abrasion
Avoid on
- Soft-touch coated plastics (can bubble or peel)
- Piano black trim and clear plastics
- Leather/vinyl (use repair methods designed for them)
Step-by-step (safe approach)
- Clean and dry the area completely.
- Set a hair dryer to warm (skip a heat gun unless you?re experienced).
- Hold it 6?10 inches away and move continuously.
- Warm for 10?20 seconds, then stop and inspect.
- Repeat in short cycles until improved. Don?t chase perfection?stop before the texture changes.
- Finish with a light interior protectant to even out appearance.
What ?success? looks like
- Whitening reduces
- Edges of the scratch soften
- Texture remains consistent with surrounding area
Common outcome: Heat often makes scratches less obvious rather than disappearing completely. That?s still a win, especially on large textured panels where fillers would look unnatural.
Method 3: Plastic Polishing for Glossy Trim (Piano Black and Clear Plastics)
Piano black trim and clear instrument cluster lenses scratch if you look at them wrong. The good news: these surfaces often respond well to polishing because the scratches are typically fine and shallow. The risk: aggressive polishing can haze the finish or create distortion.
Best for
- Swirls and light scratches on piano black trim
- Light marks on clear plastic screens/lenses (only if the manufacturer allows polishing?use caution)
Step-by-step (hand polish method)
- Clean with a gentle interior cleaner and soft microfiber.
- Mask edges with painter?s tape to protect adjacent matte plastics.
- Apply a small amount of a fine plastic polish to a microfiber applicator.
- Work in straight lines (not circles), using light pressure for 30?60 seconds.
- Buff off residue with a clean microfiber.
- Inspect under a bright light. Repeat if needed, but keep sessions short to avoid uneven gloss.
- Protect with a PPF film (precut if available) or a gentle interior-safe protectant to reduce future marring.
Product comparisons (popular choices)
- Novus Plastic Polish Kit: Great for clear plastics; includes multiple cut levels. Start with the least aggressive.
- Meguiar?s PlastX: Easy to use for light defects; good all-around choice.
- 3M or detailing-grade PPF for trim: Not a ?repair? product, but the best prevention after polishing.
Real-world example: If your center console piano black looks like it has spiderweb swirls, a mild plastic polish by hand can restore clarity, then a trim PPF sheet keeps it looking new even with regular wiping.
Method 4: Vinyl and Leather Repair Kits (Filler + Texture + Color)
For seat bolsters, armrests, and vinyl door inserts, a true repair usually involves filling the scratch, recreating texture, and matching color. The deeper the scratch, the more a repair kit makes sense compared to simple cleaning.
Best for
- Scratches that catch a fingernail on vinyl/leather
- Small gouges on armrests and seat sides
- Worn spots where the top coat is damaged
What to expect
- Light scratches: Often blend well with dye/top coat.
- Deeper gouges: Can be improved significantly, but may remain faintly visible under certain lighting.
- High-stress areas (driver bolster): Repairs can wear again unless sealed properly and maintained.
Step-by-step (general kit workflow)
- Clean and degrease the area (body oils and silicone protectants will ruin adhesion). Use the kit?s prep solution if included.
- Lightly sand (if instructed) with very fine abrasive to remove loose edges. Wipe clean.
- Apply filler/compound in thin layers. Don?t try to fill a deep scratch in one heavy pass.
- Texture match using a grain pad or texture paper if your kit includes it (this step separates ?okay? from ?impressive?).
- Cure/dry as directed?some systems use gentle heat, others air dry.
- Color match: apply dye in light coats until blended. Feather the edges outward.
- Top coat/sealer: finish with the correct sheen (matte/satin/gloss) to match the factory look.
Product recommendations
- Colourlock Leather Repair Kits: Strong reputation for leather care systems and color products (excellent for enthusiasts willing to follow steps carefully).
- Leather/Vinyl repair kits (general): Look for kits with a filler, colorant, and clear top coat?not just a single ?paint.?
- SEM Color Coat (for certain vinyl/plastics): More of a refinishing option than a ?repair kit,? but great for recoloring after prep (best when you can spray evenly).
Real-world example: A dog?s claws leave a gouge on a vinyl door insert. Cleaning won?t help. A filler + texture pad reduces the gouge, and a matched dye makes it far less noticeable?especially from normal viewing distance.
Method 5: When Replacement or Professional Repair Makes More Sense
Sometimes the smartest ?method? is knowing when to stop. If the scratch is in a highly visible, high-touch area and the material is torn or missing, DIY repair may never look right.
Consider replacement or pro help when
- The material is torn (not just scratched)
- A soft-touch coating is peeling (DIY spot repairs rarely blend)
- The damage is on an airbag cover (safety-critical area)
- The panel has complex shapes or heavy texture you can?t replicate
Cost reality check
- DIY repair kits: typically lower cost, best for small to medium defects
- Mobile interior repair tech: higher cost, often the best balance of appearance and time
- OEM trim replacement: most expensive, but most ?factory-correct?
Common Mistakes to Avoid (These Cause 80% of Bad Results)
- Skipping prep/degreasing: dressings and body oils prevent fillers and dyes from bonding.
- Using a magic eraser aggressively: it can permanently dull textured plastics and soft-touch coatings.
- Overheating plastics: heat guns can warp trim, change texture, or create shiny spots.
- Choosing the wrong sheen: a glossy top coat on a matte panel will scream ?repaired.?
- Trying to ?perfect? a deep gouge: chasing invisibility can make the surrounding area look worse.
- Not testing in an inconspicuous area: always spot-test cleaners, polishes, and dyes first.
Quick Method Selector: Which Repair Should You Choose?
- Looks like a mark, not a scratch: start with cleaning/APC ? gentle melamine if needed
- Textured plastic is whitened: cleaning ? cautious hair dryer heat reflow
- Piano black is swirled: plastic polish (least aggressive first) ? protect with PPF
- Vinyl/leather scratch catches a nail: filler + texture + dye/top coat
- Tear, missing material, peeling coating: pro repair or replace the panel
FAQ: Scratch Repair Methods for Car Interiors
1) Can I use car paint scratch remover on interior plastics?
Usually not a good idea. Many exterior compounds are too aggressive for interior plastics and can haze or permanently dull the finish. Use a plastic-specific polish for glossy interior trim and a cleaner/protectant for textured plastics.
2) Do leather conditioners remove scratches?
Conditioners can reduce the visibility of very light surface marks by improving the look of dry leather, but they won?t fix a scratch that?s cut into the coating. If your fingernail catches, you?ll typically need filler and color for a real improvement.
3) Is a heat gun safe for interior scratch repair?
A heat gun is risky inside a cabin because it heats quickly and can warp trim, change texture, or damage nearby materials. A hair dryer is a safer choice for mild reflow attempts on textured plastic, and even then you should work slowly.
4) How do I match the color of vinyl or leather repair dye?
Start by identifying whether the finish is matte, satin, or gloss. For best results, use a brand that offers custom color matching or mixable dyes. Apply in thin coats and feather outward; a perfect match is less critical when the sheen matches.
5) Why does my repair look good until sunlight hits it?
Sunlight highlights differences in texture and sheen. Even if the color is close, a smoother patch on a grained surface (or a glossier top coat on a satin panel) becomes obvious. Texture matching and the right clear coat sheen solve most of this.
6) What?s the best way to prevent scratches after repairing them?
Use smart protection where it matters:
- PPF or trim film on piano black and touch-prone glossy areas
- Seat covers or bolster guards if you slide in/out frequently
- Regular gentle cleaning with soft microfiber (avoid dry wiping)
Next Steps: Get Better Results with a Simple Plan
If you take one thing from this guide, make it this: choose the least aggressive method that can realistically solve your scratch. Start with cleaning and inspection, then escalate to polishing, heat, or repair kits only when the surface demands it.
- Today: Identify the material and do the fingernail test on the scratch.
- This weekend: Try cleaning/transfer removal first, then choose one targeted method (polish, heat, or filler/dye).
- After the repair: Add protection?PPF for glossy trim, and a non-greasy protectant for plastics and vinyl.
Want more practical interior care walkthroughs, product picks, and DIY-friendly fixes? Explore more guides at carinteriormix.com and keep your cabin looking sharp.